
Want to know when you can safely cross the Bramble Bank and keep clear of obstacles in Osborne Bay? Use our local knowledge gleaned from Peter Bruce’s study of tides and Ian Lallow’s practical tips

Shallow with shingle and mud, the Eastern Solent has a different character from the western part, yet there are just as many opportunities for a smart navigator to get ahead.
This information comes from our popular Essential Weather Rail Guide, which was published in 2001, so some of the names of marks on charts have been updated for 2015.

Also be aware that there is now a large breakwater surrounded by yellow exclusion buoys, which can make it harder to identify some race marks. See Cowes Online for up to date details.
However, some things don’t change and the local knowledge here is still relevant to racing in the Solent today.
See also our guide to racing in the Western Solent
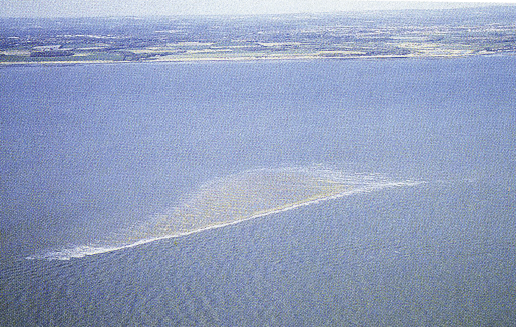
Photographs taken by Peter Bruce at times of exceptionally low tide.

Peter Bruce’s book Solent Hazards is still available – see his website for more information
Caught in concrete

While the Peel wreck is well-known and well-marked, the obstruction that lies to the north-west of it frequently trips people up. A large block of concrete catches several boats out every year.
If beating into a north-east or easterly breeze againt a west-going tide, you could find yourself in here, but more frequently you’ll be trying to sneak out of the east-going tide by slipping out of the main channel with the wind behind you.
The Admiralty chart position is the best guide as to precisely where the problem lies.
Wind from the north, go north
If the wind fills in from the north or north-west, courses will often be set taking you towards North Ryde Middle and upwind to the Deck/Clipper area.
In this case head for the mainland shore to take advantage of the starboard tack lift. The wind will often best around to the north-east as you approach the windward mark.
Osborne Bay

Keeping close to the Island shore when heading west presents a number of underwater obstructions as you enter Osborne Bay.
The remnants of the Royal Bathing Pier extend 400m out from the Tea House on the shore. Further to the west a drying patch of rocks lies about 150m offshore.
Peel Bank wreck
A large concrete wreck lies 17m SSW of a red wreck buoy. There are three areas of less than 2m shown on the chart for Peel Bank
Shrape mud
If you’re hugging the Island shore as you hear west, beware of the Shrape, which runs 200m WNW from the Norris Castle summerhouse, the lone square building on the shore.
The bank rises steeply so as soon as Ryde disappears behind Old Castle Point, watch the depth carefully.
Norris Rocks

On the final push to the finish, watch out for the long finger of Norris Rocks. the west side of the gap in the woods marks them. Further to the west the bottom shelves gradually and is strewn with boulders.
Further round the headland, watch out for rocks which extend out fom the shoreline and create a small trap that is easy to get drawn into if you’re making the best of a west-going eddy close into the shore when the main tide is running east.
Lee Point
A mud and sand spit extends 400m out into the Solent. The bank ends 50m beyond a green post.
This area is unlikely to cause any serious problems as it rarely pays to get too far inshore here anyway. The whole area north of the North Channel is pretty shallow, with little difference in the tidal streams as you further inshore.
Taking a Ryde
In theory the shallower water over Ryde Bank does provide less tide and a potential advantage. In practice you will frequently find yourself crossing deeper water to the north and south of Ryde Bank, which will more than negate any advantage.
In most cases you will need to take the bull by the horns and choose a shoreline. [See David Houghton’s notes on Solent breezes]
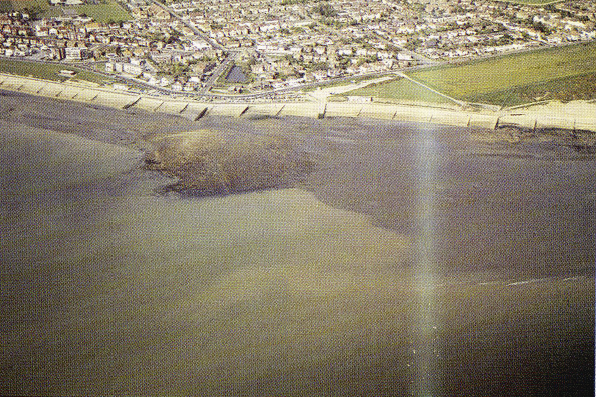
Hill Head shoreline
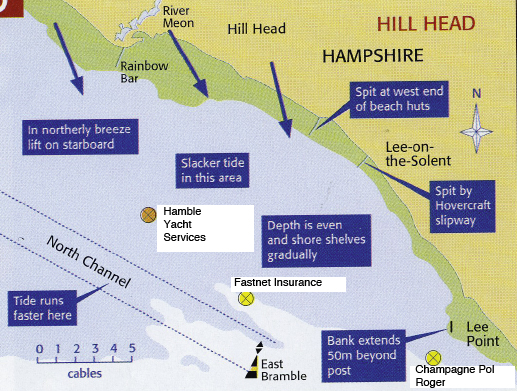
The mainland shoreline at Hill Head shelves gradually, making this a large shallow area to negotiate. Rainbow Bar is a shell and shingle spit to the west of Hill Head Haven and is marked by a black and yellow post with a large topmark shaped like a 3D cross.

Another shingle spit extends out from the shore just to the west of Lee on Solent airfield. The spit extends out from the west end of a line of beach huts (not shown).
Further to the east a concrete hovercraft slipway extends 100m out from the shore, marked by the aircraft hangars.
Ryde Sands
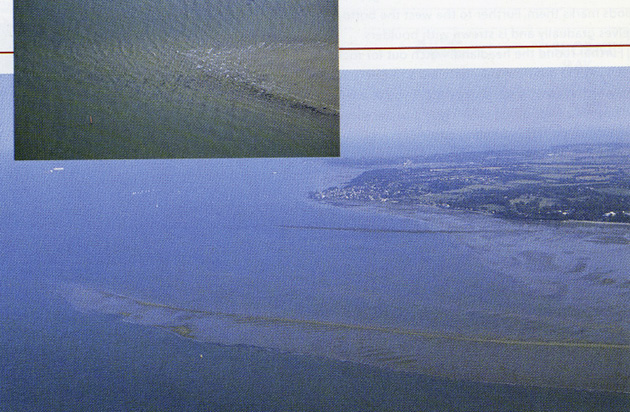
A familiar trap if you are getting in close to the Island shore as you head west. it is all too easy to go aground here as you head out into what you think is deeper water.
Ryde Sands dry out at low water, but near high water vessels of moderate draught can use the SW Mining Ground buoy and the red Sandshead Post off the north-east tip of the Sands and the Radar Post roughtly off the Debnigo (inset) as reference marks to be kept to the south.
Since Radar was established in its present position, the tip of Debnigo has moved well to the east.
Crossing the Brambles
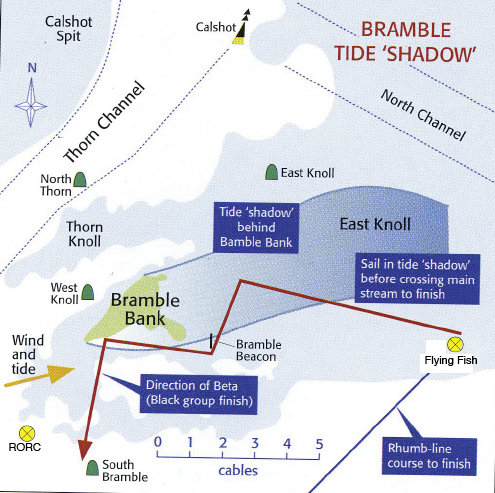
The Bramble Bank is the biggest hurdle in the Solent and is best avoided, but it can be useful to exploit its tidal shadow.
When approaching from the east against an east-going tide, particularly if you’re heading to the finish from a mark in the middle of the Eastern Solent such as East Bramble the tidal shadow behind the bank can be worth exploiting.
Aim for the Bramble Beacon or even to the north of it to keep well out of the tidal flow.